
Routing Kontakt’s multiple outputs in FL Studio isn’t totally intuitive, so let me try and make it clear by providing a few easy to follow steps.
How to route multiple outputs to FL Studio’s mixer panel
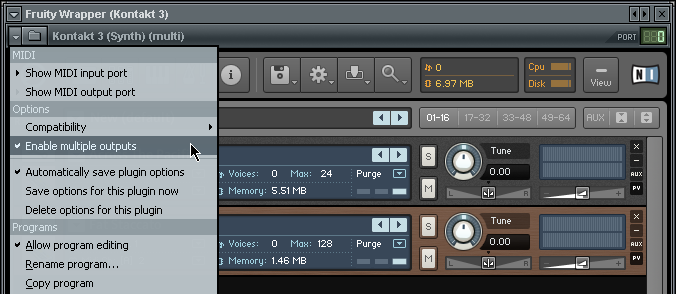
- Make sure “Enable multiple outputs” is checked in the plug-in wrapper menu.
- Add additional output channels in Kontakt’s “Output Section”.
Configure each new channel to have a physical output. Don’t forget to rename the channels, since <new> isn’t very descriptive.
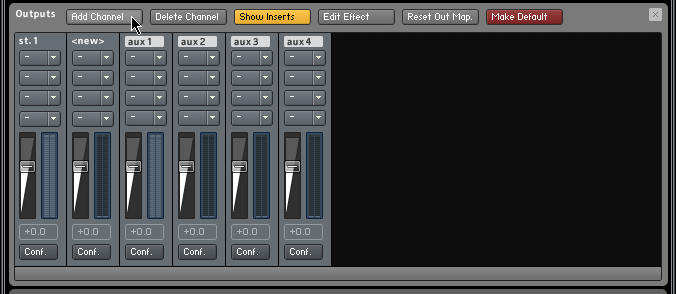
Click the little conf. button in the bottom of the mixer channel to configure the physical outs
- Assign outputs to the instruments in your Multi.

A new output called st. 2 gets assigned to the second instrument in the multi
- Link the Kontakt instrument wrapper to a mixer channel.
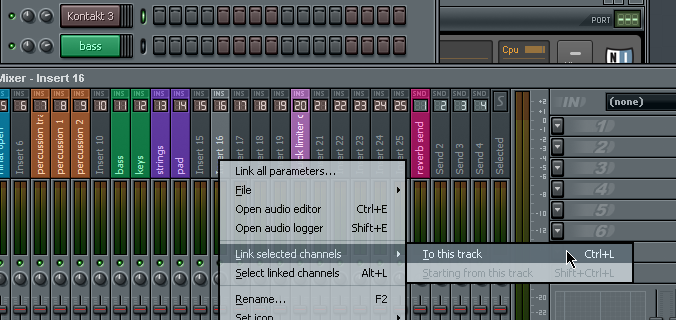
Simply link the Kontakt instrument channel and the rest will follow
That’s it!
The st. 1 output, usually the first instrument in your Multi, is now routed to the mixer channel you’ve assigned the Kontakt instrument wrapper to. The other instruments are linked to additional mixer channels to the right of the initial mixer channel.
In the example above I linked the Kontakt instrument wrapper to mixer channel 16. The second instrument which is on the st. 2 output will automatically be mapped to mixer channel 17.
External VST effects can now easily to applied to individual Kontakt instruments in the multi.
