We’ve reached the final step of our music creation process: mastering.
In two previous articles, we’ve navigated different preceding stages of music creation. At first we were in production, where we created compelling vocal harmonies with VocalSynth 2. Once we finished laying down our musical ideas, we explored mixing, learning how to mix our lead vocals with the rest of the track. We’re now ready to apply the final touch to our track – let’s finish it off with some mastering, which we’ll implement with iZotope’s Ozone 8 Advanced.
iZotope recently released Ozone 9 Advanced, which offers even more powerful features — learn more about them here.
We’ll be working with the same project we’ve been using throughout this mini-series for demonstration purposes:
Although it’s just a small excerpt, the track sounds fairly polished – it’s loud without being absolutely squashed, the stereo image is clear, and the mix nicely spans the entire frequency spectrum. Let’s explore how we achieved this master using reference tracks and Ozone 8 Advanced.
Why use reference tracks?
Chances are you’ve heard this cautionary advice before: “don’t master your own song.” There’s a good reason why many people stand by this; if you’ve spent countless hours producing any track, it’s likely that you’ve lost some perspective and objectivity along the way. A fresh pair of ears that hasn’t listened to the track hundreds of times can help make less biased adjustments that you may have not considered.
That’s not to say that creating a good self-master is impossible. However, it means that you have to be extra mindful of using tools that help you stay grounded and objective. Metering and room treatment are key, but they can take time and resources to set up. Using reference tracks (professionally mixed and mastered tracks that you can measure your master against), however, is a habit that you can start practicing immediately. Ozone 8 Advanced’s Master Assistant allows you to maximize the power of using references in just several simple steps.
1. Upload reference tracks to Ozone 8 Advanced
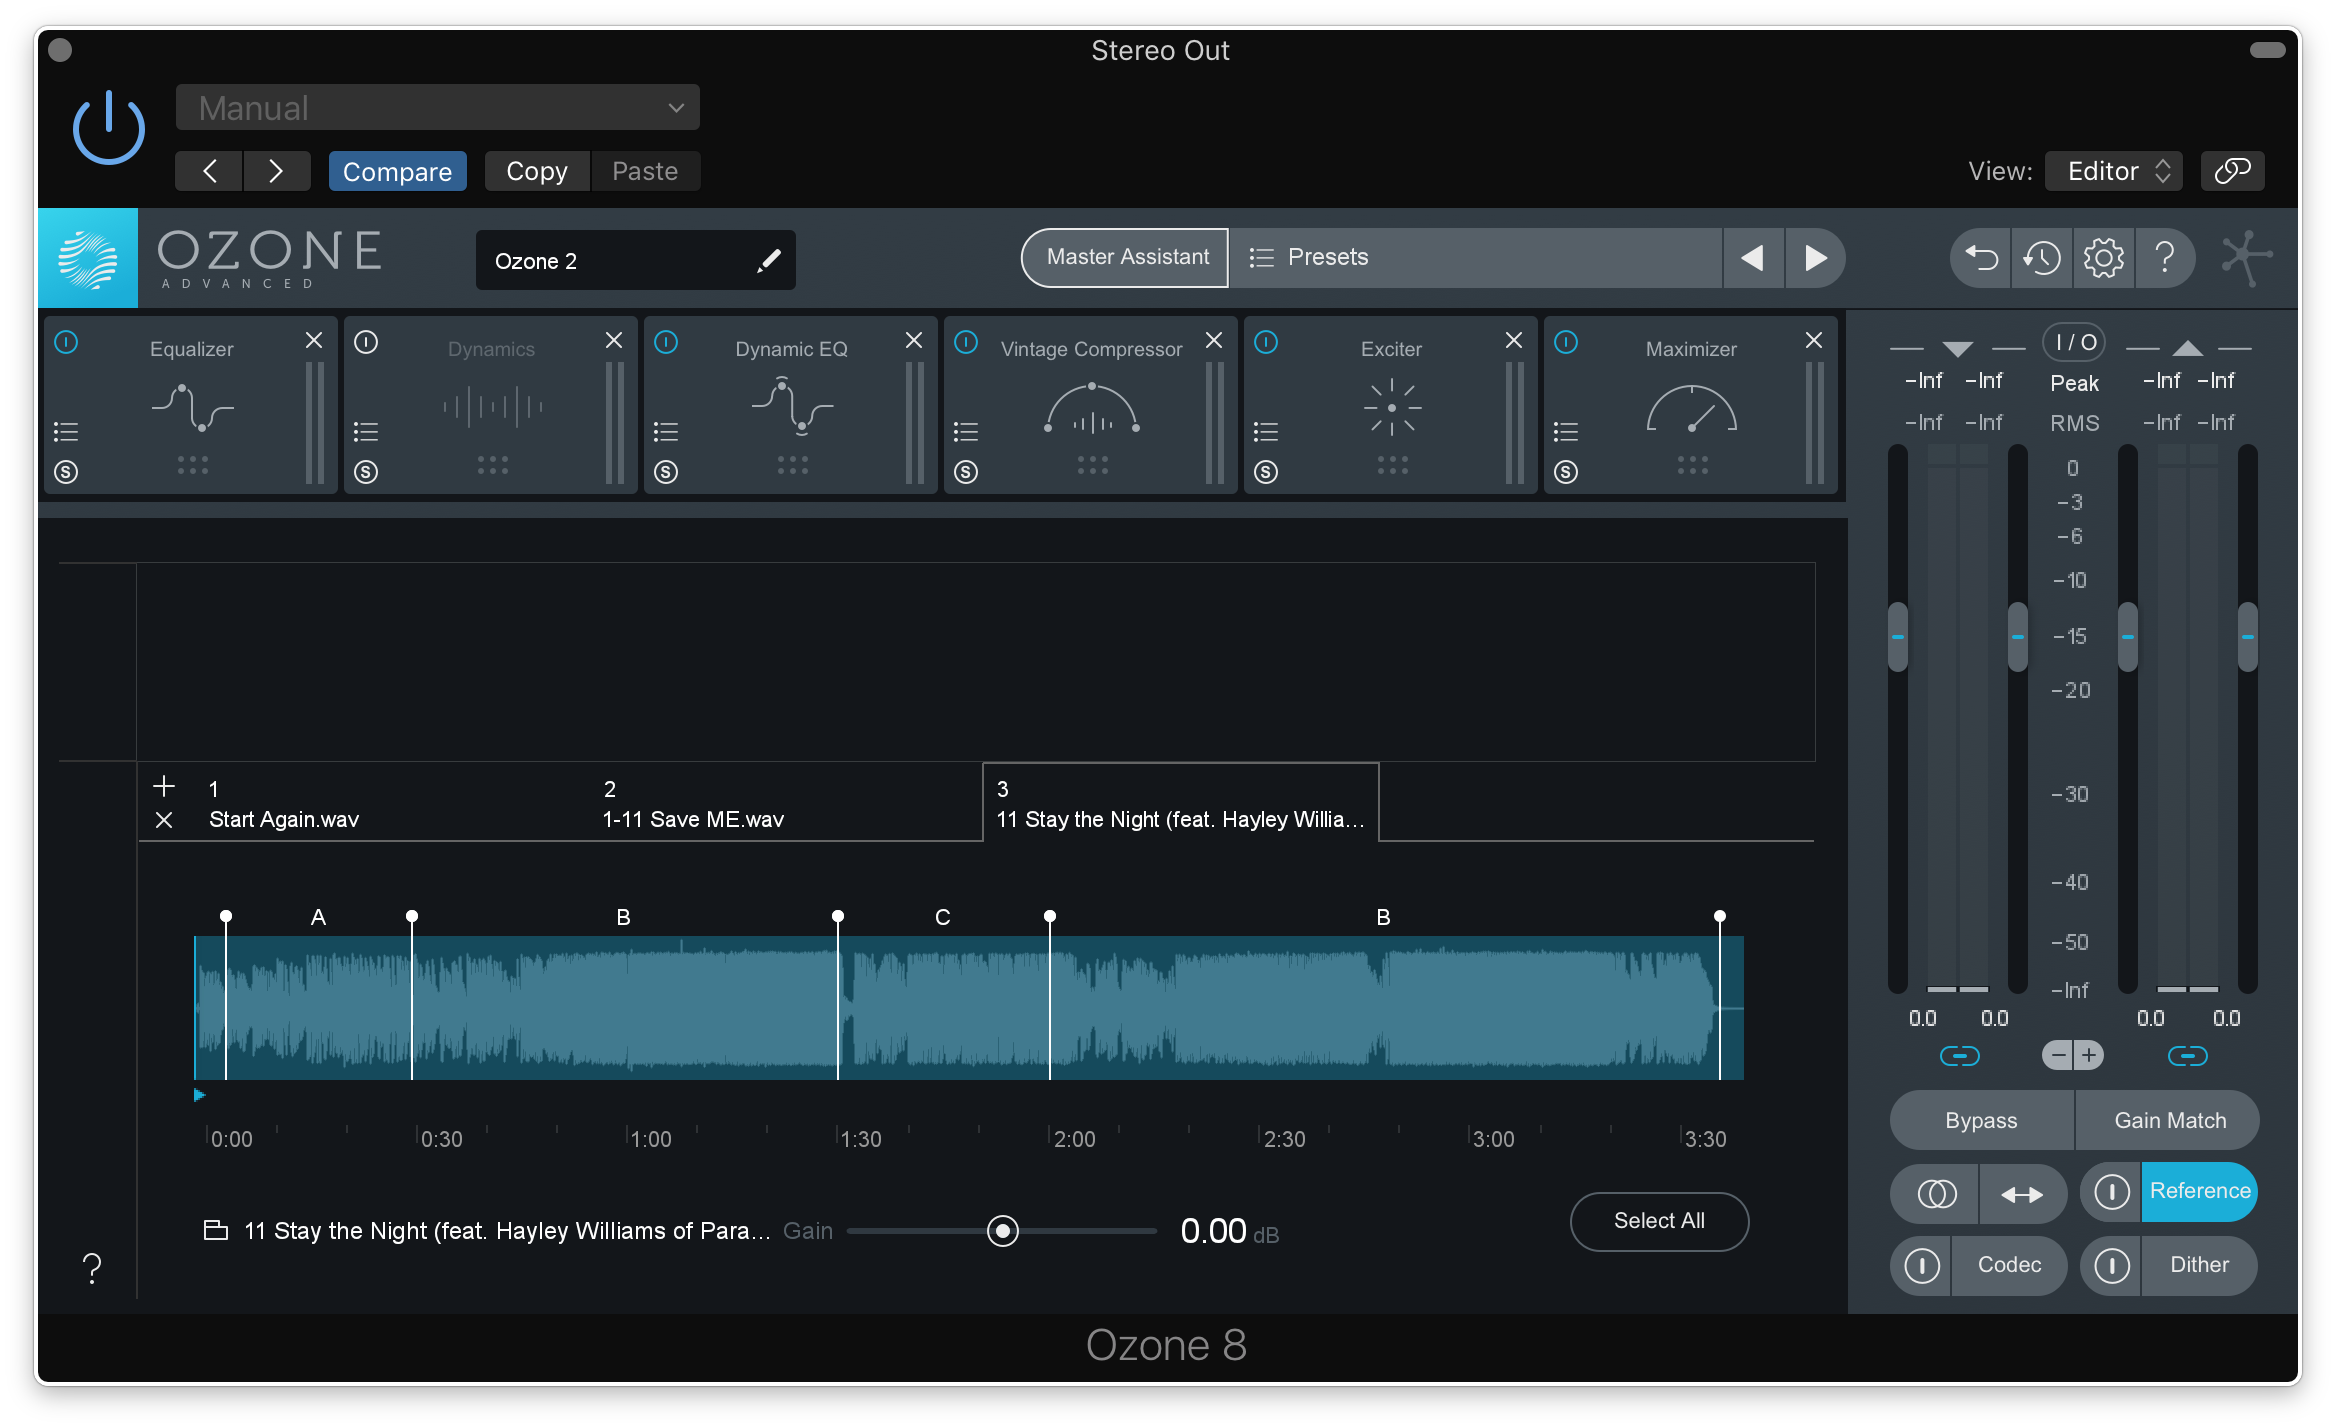
 Start off by adding an instance of Ozone 8 Advanced to your master track. Before we pull up Master Assistant, let’s first add some reference tracks by hitting the Reference button on the bottom right of the GUI. You want to ideally select tracks that are in a similar genre / style to yours, and the higher quality files you have, the better. For this track, I’ve uploaded three songs that I want to emulate the masters of:
2. Create a starting point with Master Assistant
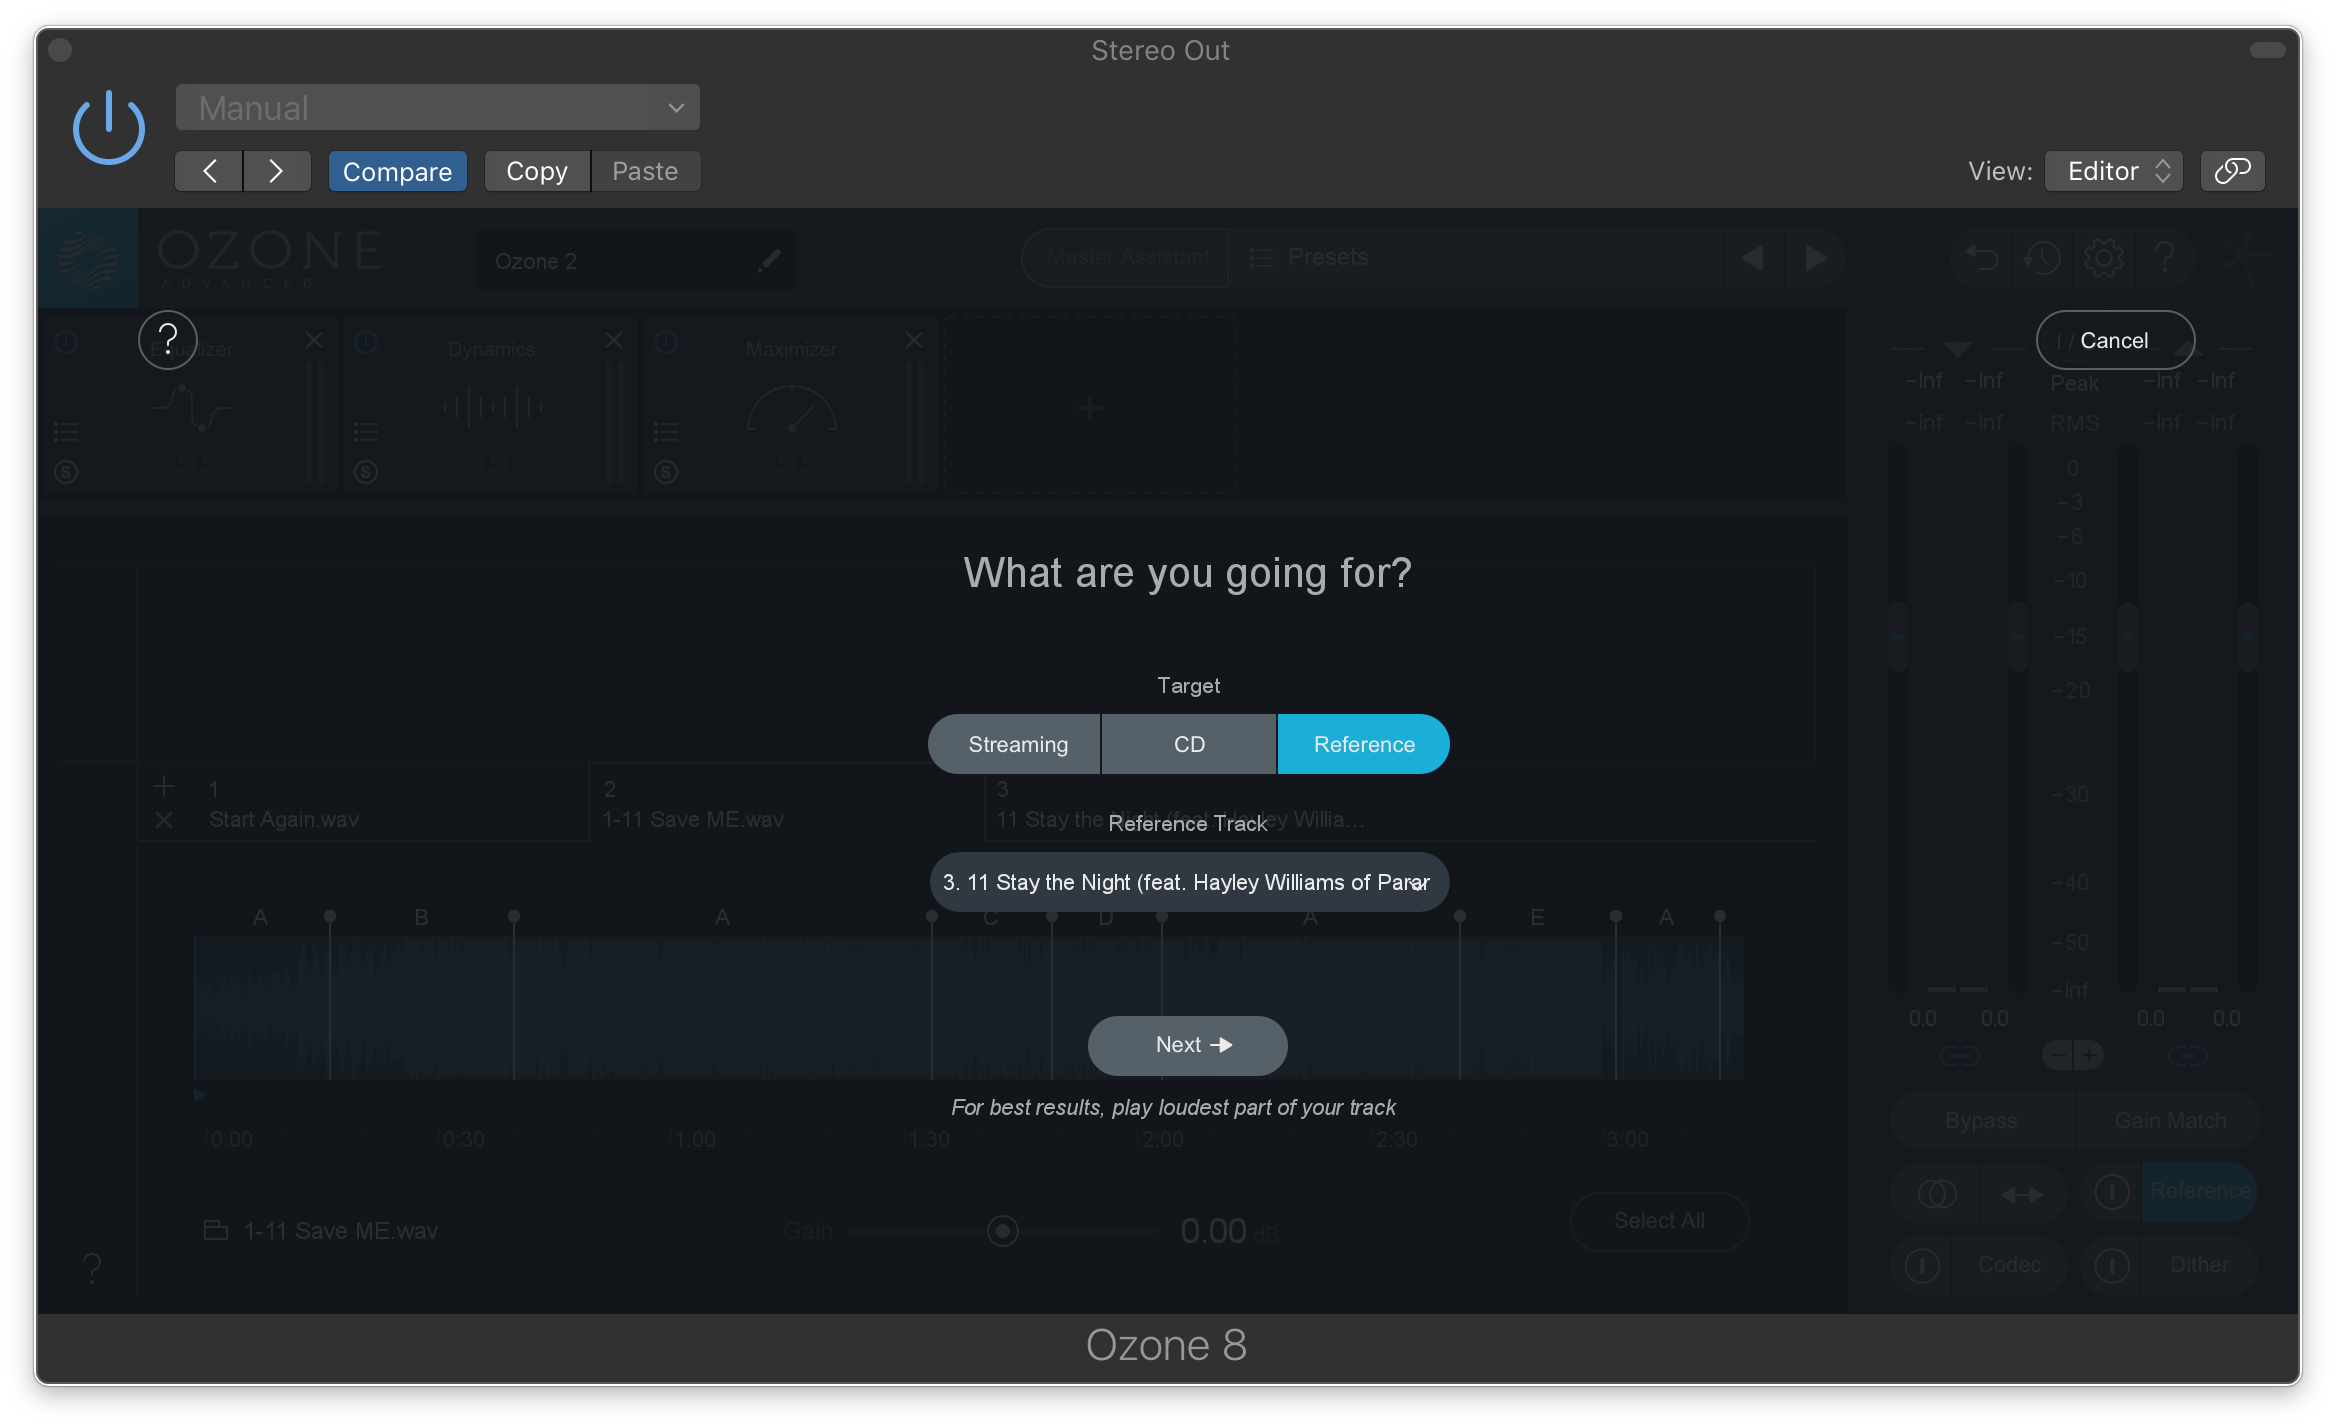
Now, go to Master Assistant, select Reference as your target, and choose one of your uploaded tracks. Once you hit “Next,” Master Assistant will prompt you to start feeding it audio. It’s important that you play the loudest part of your song here – in my case, I’ll play the second half of the excerpt, where the entire arrangement kicks in. As soon as you start playing audio, Master Assistant will get to work by implementing corrections and enhancements that bring your track closer to your reference track’s loudness, spectral balance, etc.:

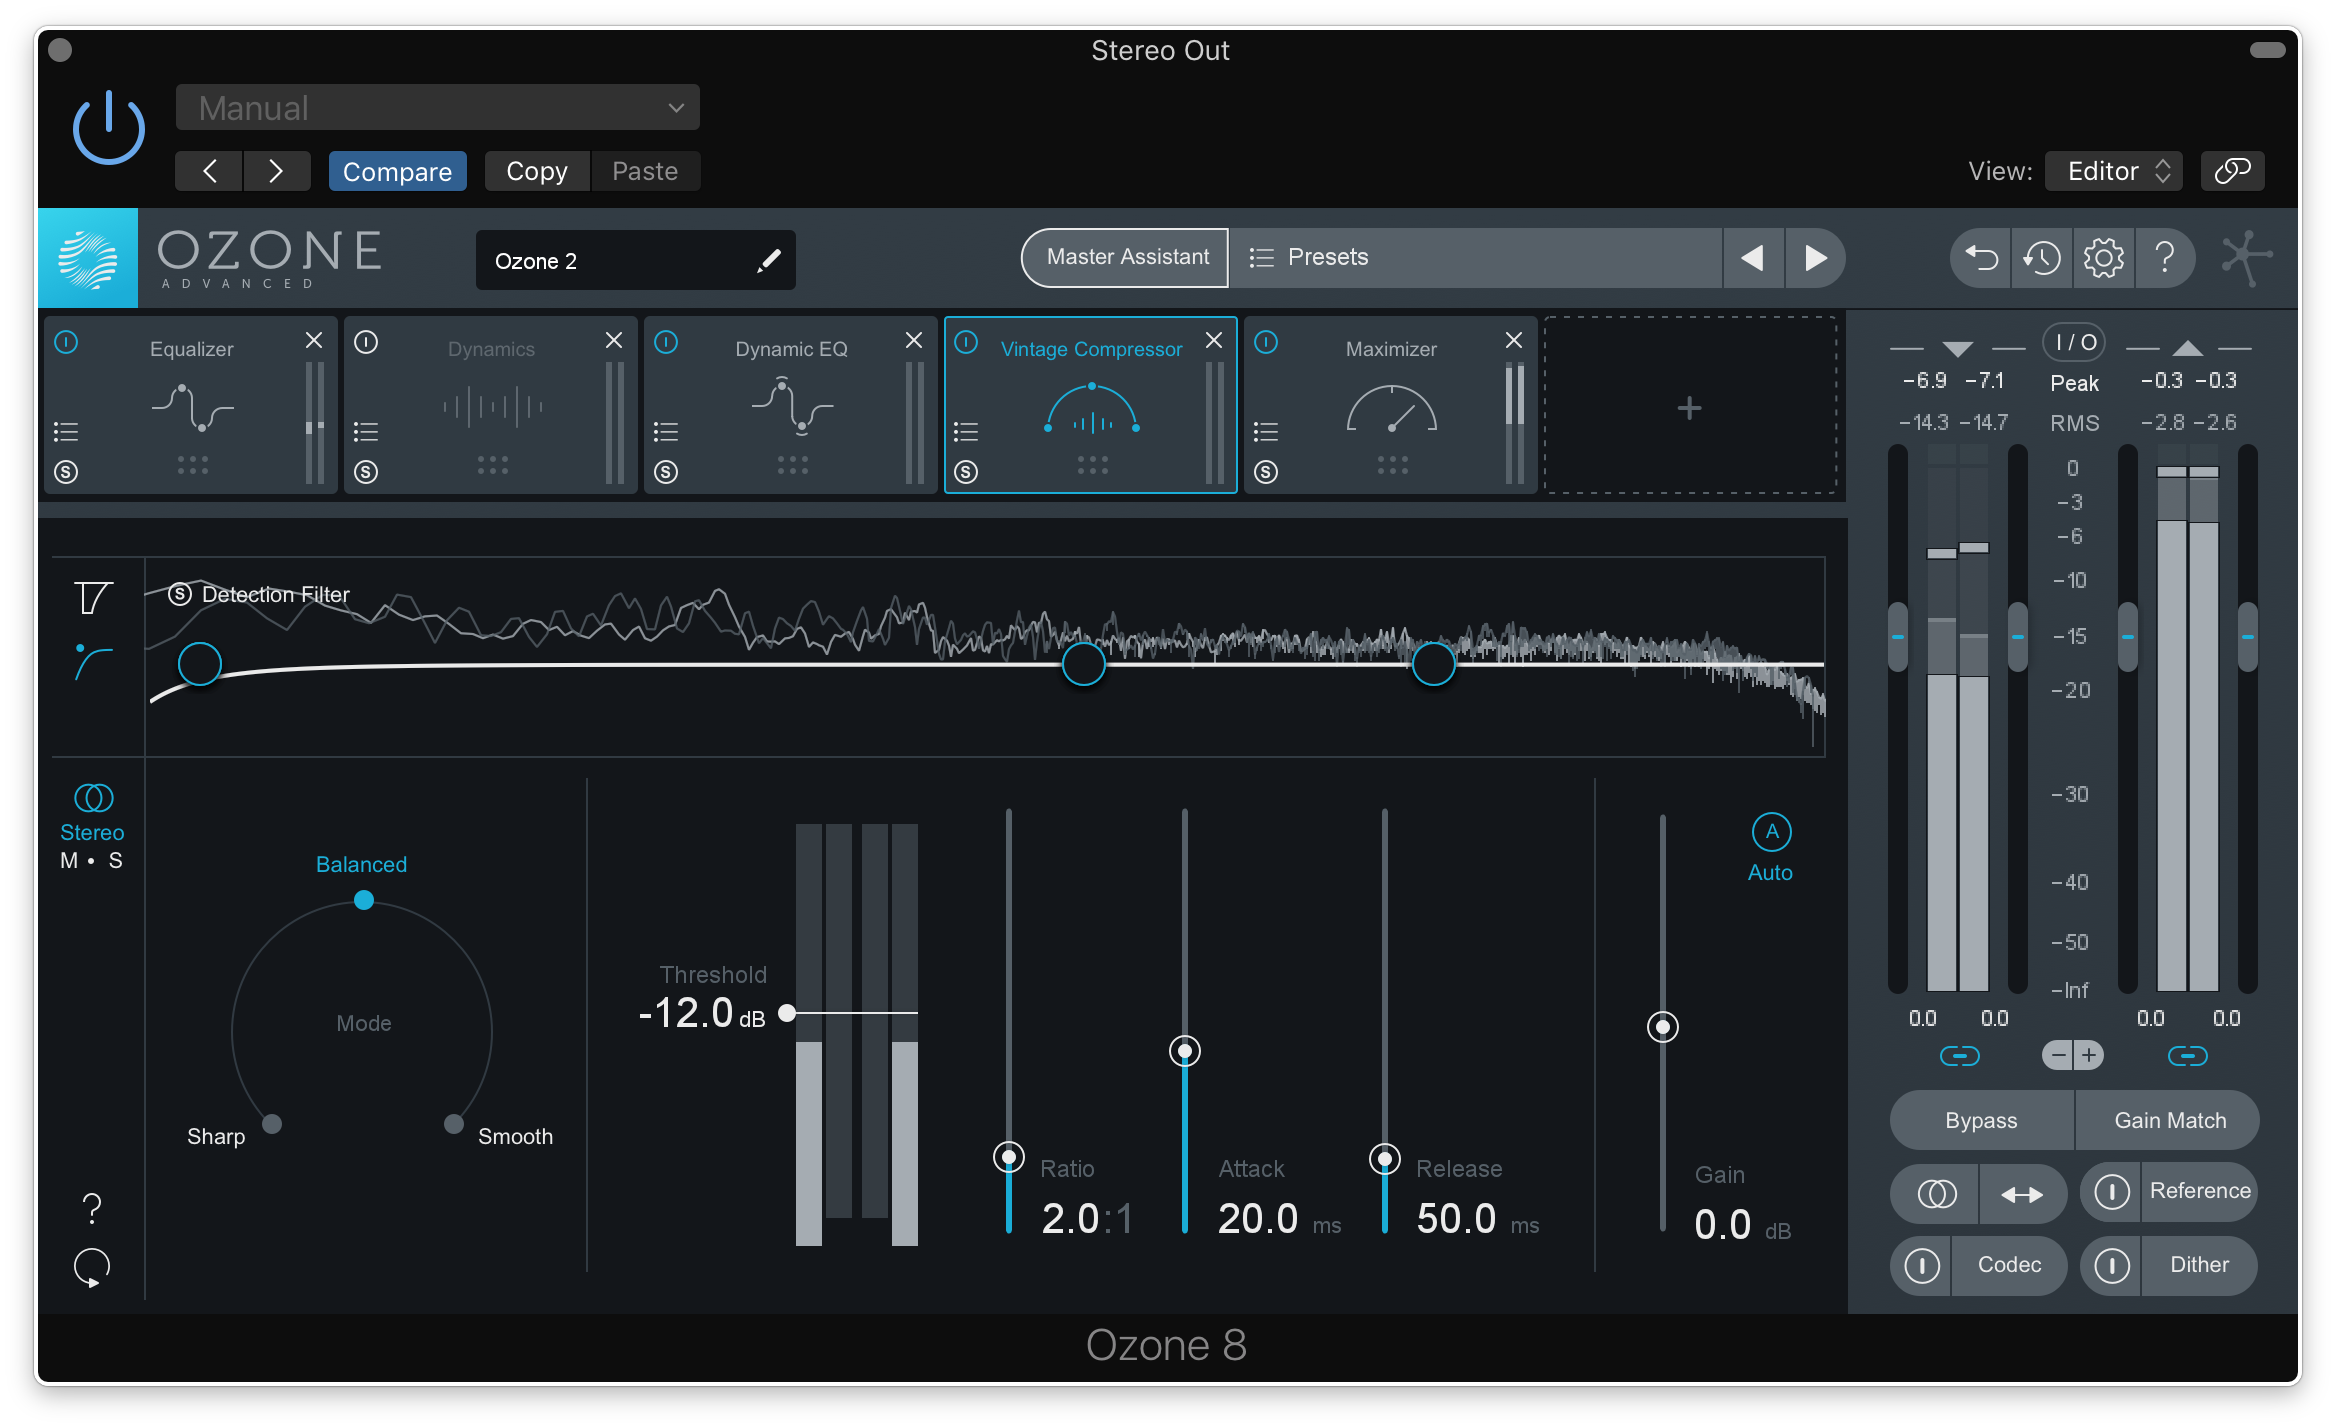
Once it’s done analyzing, Master Assistant will offer you a mastering chain that’s customized to your reference track. Mine looks like this:

3. Enhance the master with your own creative decisions
Now that we have a starting point that’s both intelligent and unbiased, we can go in and make creative adjustments as we see fit. I liked the EQ adjustments that Master Assistant made, but I immediately felt that the Maximizer (what Ozone calls their limiters) was doing too much work in bringing up the gain. As a general rule, you want to stage your gain at the mastering stage. Though it’s admittedly satisfying to turn on the limiter and hear your loudness triple, this isn’t good for your mix – you’ll be prone to pumping and tons of transient loss due to the limiter chopping off large amounts of your signal.
To combat this (and to add some additional color), I’m going to stage my gain by adding a subtle Vintage Compressor and an Exciter before the signal hits the Maximizer:
Pro Tip: Note that although loudness is important to an extent in creating a track that competes with commercial mixes, the rise of streaming services and the fall of CDs has made it less of a necessity (in fact, many streaming services’ normalization standards will punish tracks that lack dynamic range). Increasing loudness is undoubtedly still a part of the mastering process, but prioritize preserving dynamic range and crafting a final product that sounds exciting and clean, no matter what level it’s played at.
4. A/B with your reference tracks and keep making adjustments
The most important thing you can do with reference tracks is to A/B them against your track. Ozone 8 Advanced makes this easy – simply return to the Reference window to select any reference track, identify a particular section in the waveform that you want to A/B (Ozone intelligently places some adjustable markers for you), and hit the circular icon next to the Reference button to seamlessly go back and forth between your track and the reference.

Although Master Assistant is a trusty second opinion, mastering is ultimately an artistic process. Use it primarily as an intelligent suggestion that you can work off of, and don’t be afraid to challenge its settings after you’ve done your own A/B-ing.
To wrap up, let’s hear how our track sounded before we mastered with Ozone 8 Advanced:
…and how it sounds after we applied mastering with Ozone 8 Advanced:
This concludes our mini-series that covered producing, mixing, and mastering a track with VocalSynth 2, Nectar 3, and Ozone 8 Advanced respectively. If you have any questions, leave them in the comments below.
January 7, 2019