
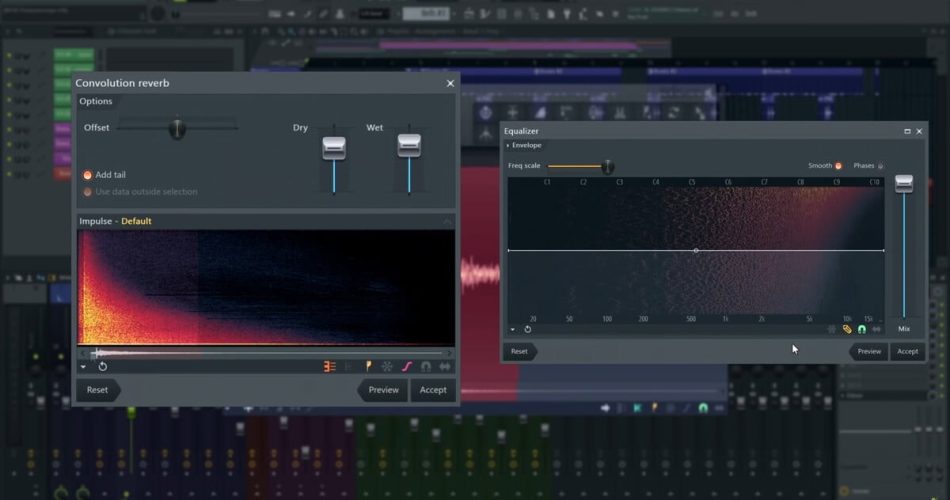
Image-Line continues its series of tutorial videos on the Edison audio editor in FL Studio with a look at the convolution reverb tool, which allows you to imprint the sound of one audio file onto another.
While it sounds complex, the process is simple. Convolution triggers playback of an ‘impulse’ (the audio you want to imprint on your destination file), for every sample in the destination file. If the destination file is a single click, 1 sample at 100%, then you will hear the impulse response and nothing else. If its two clicks 10 ms apart at 20% level, you would hear two copies of the impulse file layered together with a 10 ms delay at 20% of their original level. In this way convolution is similar to playing a sample on a keyboard, triggering it for every sample of the input (affected) waveform with sample playback velocity (level) tracking the value of the samples in the destination file.
A reverb effect is created when a reverb ‘impulse’ file is convolved with the original wave file. Reverb impulse files are created by recording short, sharp sounds in real spaces or through a reverb/effects unit. The recorded ‘reverberance’ is an acoustic fingerprint of the real space.
The tutorial below has a detailed overview of the convolution reverb.
Another video shows how to use the integrated equalizer in Edison.
The Equalize Tool is a linear phase EQ and boosts or cuts frequencies according to a user defined EQ envelope.
You can try Edison and its convolution reverb and equalizer tools with the free, fully functional and time unlimited trial version.
Make sure to check the previous three Edison tutorial videos on audio recording and editing, and Edison’s advanced tools and fx as well.
More information: Image-Line
